Saturday, August 2, 2014

Phase II (Upstairs)

With the first floor mostly done, we decided to address our upstairs area. With baby Parker coming in October, we wanted to take out this old, 2 previous owners used, dingy carpet and replace it with hardwood.

Hallway (with added benefit of dog pee)
Master Bedroom (With our dogs blanket) 
Master Bedroom Sitting Area
Master Bedroom Closet (My side, Lauren's side is overflowing!)
We decided on gunstock wide plank to match the current hardwood on the stairs and railings. Through a local small business, we got the hard wood in a single day and we couldn't be happier.

Master Bedroom Sitting Area
Master Bedroom Closet
Hallway (Opposite view from one with carpet) 
Of course with removing carpet and adding hardwood, the house echoes much more. We also realized that having hardwood on the main floor and bedroom was killing our feet. To fix that we got a 8x10 carpet off of wayfair.com (which really was shipped at 7'10"x9'x10').

Master Bedroom with new carpet
On top of the hardwood and new rug, Lauren finally picked out a ceiling fan  to replace our 1990 gold ceiling fan.

1990 Fantasticness 
A Touch of Modern
Hope this helps you finally tackle that "Honey-do-list"!

Saturday, June 28, 2014

Baby Nursery

We are expecting!

Only means one thing.....more renovations!

We decided to start off with a blue base with crown molding and some new blinds. 

We did our usual trick of a regular crown molding, adding a one inch space, and then followed up with trim to make the crown molding look even bigger at half the cost. 


After primer and paint on the molding, I had to tape off the entire room. On a side note, I feel like taping takes just as long as painting. 


As the paint on the molding was drying, I decided to put in some faux wood blinds. These make a world of difference from our metal blinds that came with this older home, but to everyone else seems like how it should look. 


After the paint on the molding dryed, I was able to slap on the base blue for our son's nursery. 


Base is complete. Now to do the hard part....decorating. Oh, and hanging some mirrors and shelves. 

Sunday, May 11, 2014

Curb Appeal Complete....for this year

Finally! It only took us 7 months to complete but we're done for this year.

List of curb appeal items we had to complete:
- Widen Driveway
- New Walkway
- New Exterior Lights
- New Sod
- Pull Out All of the Plants
- Replant Plants
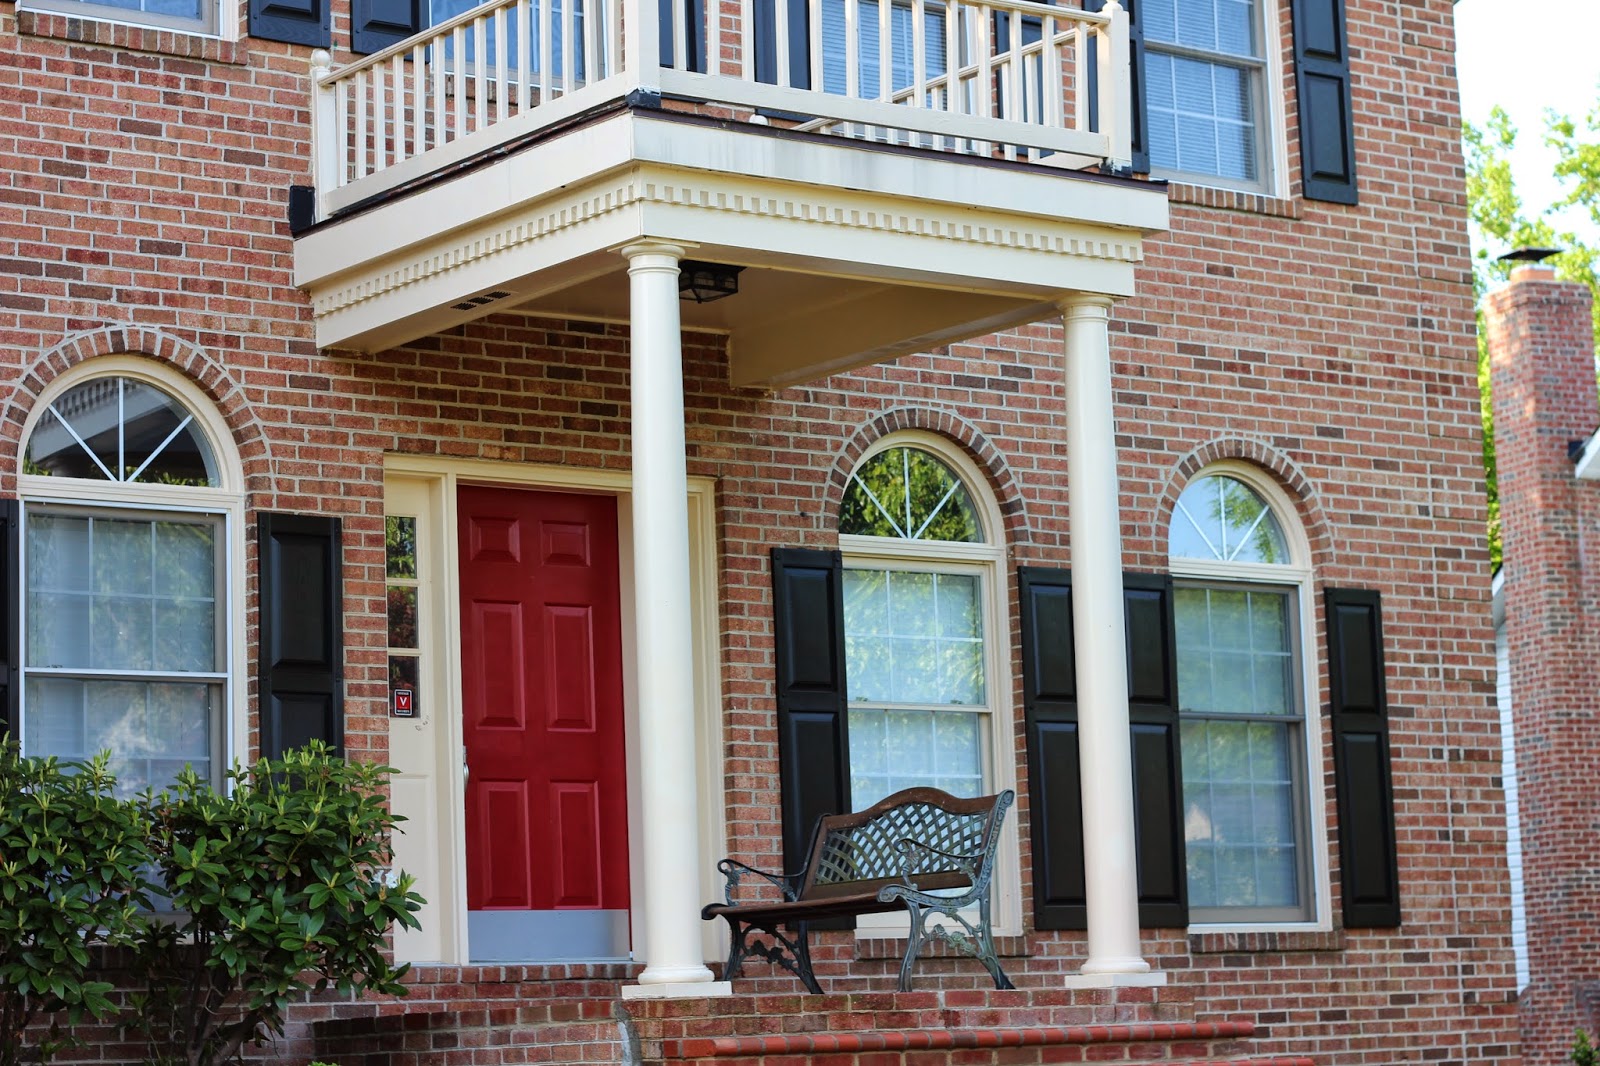
- Paint Shutters Black and Door Red

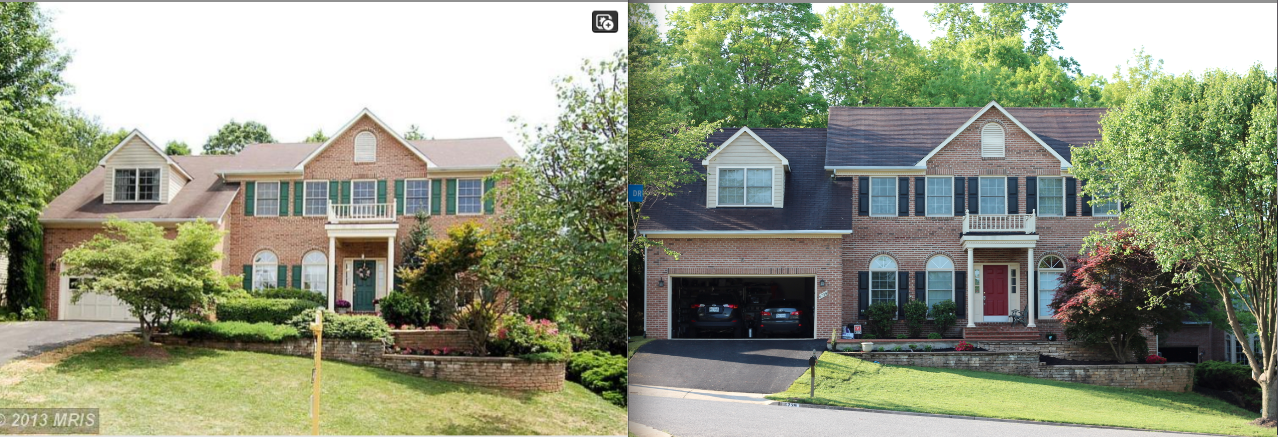
This is what is was like when we bought it:

Here are the following stages:
Took out the bushes
Laid down the concrete foundation of the new walkway
Laid new brick walkway
Replaced outside lights
Removed and replaced porch light
When it was all said and done, we ended up with something like this:

Before and After:


Sunday, May 4, 2014

Finishing Up Things We Started

Back in October of 2013, we decided that the curb appeal of our home was a jungle. We really wanted to clean it up by taking out all of the over grown plants and redo our walkway.

Fast forward to April of 2014 and we took out our walkway and most of the plants but we didn't finish it. For over 6 months, we had no step to our stoop and a big concrete slab as our walkway.

This was something we did NOT do ourselves since I'm no mason (although I did graduate from George Mason). Since we did not do it, I cannot tell you how to do it yourself, but I can tell you its a very tedious job.

It takes patience and more patience to make sure every brick is the right size and level; however, once it was all done, we couldn't have asked for better results.

Hope you feel the same way we do about our new walkway.

6 Months of This


Sunday, April 13, 2014

All of the Lights

Just like our wedding, my wife has a propensity to focus on the little things. Whether it was the drink stirrers or knot type on each of the favors, she found a way to focus on these small issues and make a proverbial mountain out of a mole hill.

So what does this have to do with lights? Our home was built in 1994. With that comes all of the outdated, trump style, faux gold fixtures. 

What was once a passing comment, "I hate those gold light fixtures on our garage" turned into "When are you going to change those damn light fixtures on the garage!"

Here is the thing, she already has 500 other things on her "honey-do-list" and now this just got bumped up to priority number 1. Its like ADHD home renovation! At this rate, we will have a bunch of half finished things! 

I digress. 

Here is what we were initially dealing with:


As you can tell, its a bit dirty, but trust me it was gold. 

So after a quick trip to my new favorite store, Home Depot, I got started. Seemed simple enough until I figured out its better to take apart the lights first, see what you are looking at, then go to Home Depot.

Long story short, the electrical box that held the lights in place was rectangular, not hexagonal, which would not be an issue if the screws to hold the new lights in place were not parallel to once another. A hex box allows for the mount to be secured at multiple points while a rectangular box only allows one way to mount the bracket (parallel to the ground).  I had to find new screws (always keep all extra screws, nuts, bolts, etc you never know when they come in handy) to jimmy rig this mount and light in place.

This is only a problem when the mounting screws for he lights are in the same location as the mounting holes for the bracket. Its hard to explain (and should have taken photos) but trust me, just take a look at what you are working with before you go. It will save you time! This also applies to everything else. Even if you think you don't need to, measure everything, write it down, and refer to it at the store!

Also, good to note, shut off the circuit to the lights and test the wires to make sure they are not live (older homes have a way for circuits and lights to have a mind of their own)

After an hour and a half (which should have taken a half hour) the lights were finally up and I got from my wife was, "Oh, they look nice. When are you going to redo the master bath vanity?" 

Our new lights that only my wife and I will appreciate and actually notice:
Manhattan Bagel Coffee to Keep Me Going


My next project, per the foreman (my wife)

Saturday, March 1, 2014

Quick TV Mount

What to do on a Saturday morning? It was one of those days where I woke up too early and had nothing to do. 

After watching some HGTV, I decided to finally mount that TV I had laying around in the basement. (Another factor was the fact that I hated watching my P90x workouts on a 13 inch screen.)

So to mount it, I took some of my own tips. 

Step 1: Prototype

Step 2: Find the stud (24 inches apart in the basement) and pre-drill the holes

Step 3: Level and screw in mount

I used painters tape to protect the wall. Not sure if it's going to help but last time I didn't use it, the mount ripped off the paint and some drywall. 

Step 4: Mount

Lessons learned: 
- I did not take into account the length of the power cable and will need to buy a longer one to be able have hidden wires. 
- Missed the stud on the first attempt but it was fine since the mount was going to cover it up. Don't worry about making a mistake. Nothing putty and paint can't fix. 

In the end, it took me 30 minutes and minimal amount of tools

Tools:
Power drill
Drill bits
Wrench
Painters tape

Before:

After:


Of course after this, I was able to workout and do work on my music. 

Tuesday, February 25, 2014

The Beginnings of a Man Cave

It's every man's dream. A place they can call their own. A place where there are no girls allowed. As Lloyd from Dumb and Dumber best put it, a place where, "A place where the beer flows like wine. Where beautiful women instinctively flock like the salmon of Capistrano. I'm talking about a little place called..." my basement.

A great friend of mind decided that as a house warming gift he would give me a dart board. Great present, right?! The problem was, I hadn't played darts since college and I knew I would end up putting holes in the wall.

I looked at etsy.com for dart backboards but they were all expensive and not wide enough. So I decided that making one would be pretty simple.

I went to the store and bought 1/4 inch plywood measuring 4x4 as the backing. I also bought some 1x2 pine boards for the frame (enough for a two frames, one to hold the plywood and wrap the felt and another to place on top of the felt for a frame look) and black spray paint. To round it all off, I went to JoAnn fabrics to buy some green felt to make it look, "legit".

All in all the materials cost me around $45 and about 45 minutes to put together.

I started by measuring the 1x2 pine boards by 4 feet lengths and cutting 45 degree angles at each end. I then pre-drilled holes into each one for the screws to hold the frame together. I put this frame aside until i assembled the backboard.

For the 1/4 inch plywood, I created another frame to secure the plywood onto. After that I placed the felt around the frame and plywood and began to use my heavy duty staple gun to keep the felt tight.

Once the felt was on, I was ready to place the initial frame (the one with 45 degree angle cuts) on top of the felt and again pre-drill holes for my screws. Before I screwed the frame on, I spray painted the frame black for a nice flat finish.

Once it was dry I screwed the frame onto the plywood for the finished product. I also took some scrap wood from the 1x2 pine and drilled 3 holes into each one and attached it with krazy glue to the board to hold the darts (of course painted the same colors as my college, Go Mason!).

Below is the finished product. I wish I took pictures along the way but didn't think about it until just now as I drink a glass of Gold Label and play darts alone, in my man cave.


Side note, my first attempt at throwing a dart was about 23 inches down and to the left of the actual dartboard. Glad I choose to make it 4 feet by 4 feet!

Hope this helps you realize that some things can be made for cheaper than just outright buying it online or in a store.